
A scraped bumper, a hail-dented hood, or a deep door scratch can leave you wondering whether your car will ever look the same again. Beyond the cosmetic frustration, exterior damage can affect resale value and even hide structural issues if left unaddressed. The good news is that today’s repair options range from quick, affordable fixes to comprehensive restorations that make damage disappear entirely. Understanding what each type of damage requires helps you make smarter decisions and avoid overpaying or underfixing the problem.
Assessing the Type and Severity of Exterior Damage
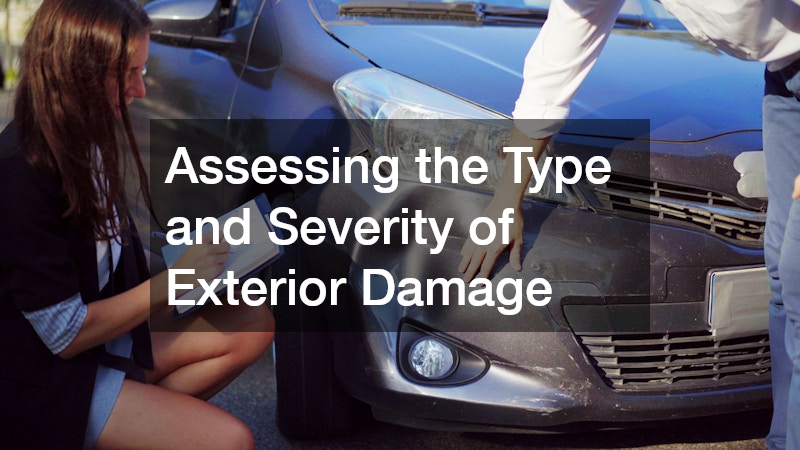
Before you can decide how to fix your vehicle, you need to understand exactly what you’re dealing with. Surface scratches, deep gouges, dents, and cracked panels all require different repair approaches, and mixing them up can lead to wasted money or a poor result. A close inspection in good lighting, ideally outdoors or under a bright work lamp, will reveal whether damage is limited to the clear coat or has penetrated to bare metal.
Start by running your fingernail across the mark. If your nail catches or snags, the scratch has likely gone through the clear coat and into the paint or primer layer; if it glides smoothly, you’re probably only dealing with clear coat scuffing that polishing compounds can address. Gouges deeper than a few millimeters, or any spot where you can see gray primer or bare metal, usually mean sanding and repainting are unavoidable.
Dents require their own checklist. Note the size, depth, and location, since a small dime-sized dent on a flat panel is often fixable with paintless dent repair, while a large dent near an edge, seam, or crease is more likely to need body filler and repainting. Also check whether the paint has cracked or stretched over the dent, which rules out paintless methods entirely.
Cracked or split panels, especially on bumpers made of plastic composite, need to be assessed for structural integrity, not just cosmetics. Flex the area gently to see if the crack spreads, and check the underside for stress lines that suggest the damage extends further than what’s visible on the surface. Taking a few photos from multiple angles at this stage also gives you a useful reference point if you later consult a body shop or file an insurance claim.
Before deciding on a repair approach, take a close look at whether the damage is purely surface-level or involves multiple layers working together. A scuff or scratch that only affects the clear coat is very different from a scratch paired with a dent, since the dent means the metal or panel underneath has been physically deformed. Run your hand over the area — if you feel a dip, ridge, or uneven surface, you’re likely dealing with more than just a cosmetic issue.
This distinction matters because the repair techniques and costs differ significantly. Purely cosmetic damage, like light scratches, swirl marks, or faded clear coat, can often be handled with polishing compounds, touch-up paint, or a DIY scratch repair kit costing $20 to $50. Damage involving dents, cracked panels, or misaligned body lines typically requires paintless dent repair, panel replacement, or professional bodywork, which can run anywhere from $150 to over $1,500 depending on the panel and severity.
It’s also worth checking whether the damage has compromised the paint down to the primer or bare metal, since exposed metal can quickly develop rust if left untreated. A quick visual check under good lighting, or even a flashlight at a low angle, can reveal whether you’re looking at a shallow surface mark or something that’s broken through multiple layers and needs more urgent structural or corrosion-prevention attention.
- Light surface scratches that only affect the clear coat — usually visible as fine white lines that don’t catch a fingernail
- Deep scratches or gouges that expose primer (gray) or bare metal (silver), often requiring fill and repaint
- Dents with intact paint, which may be fixable with paintless dent repair, versus dents with cracked paint that need filler and refinishing
- Cracked, chipped, or peeling paint sections, which often signal underlying rust or sun/weather damage
- Structural misalignment from a harder impact, such as uneven panel gaps, doors that stick, or a bumper sitting off-center
- Rust bubbling under the paint, a sign damage has progressed past the surface and into the metal
- Size and location of the damage — a bumper scuff versus a hood dent affects both repair method and cost
Handling Minor Scratches and Surface Scuffs
Not every mark on your car’s exterior requires a trip to a shop. Light scuffs, often left by shopping carts or brushing against branches, frequently sit only in the clear coat layer rather than penetrating down to the primer or bare metal. You can usually tell the difference with a simple fingernail test: if your nail doesn’t catch on the scratch, it’s likely shallow enough to buff out at home.
For these surface-level marks, a quality rubbing compound paired with a microfiber cloth is often all you need. Work in small sections, roughly one to two square feet at a time, using firm circular motions and moderate pressure. Wipe away the residue periodically to check your progress, since over-polishing one spot can thin the clear coat.
For slightly deeper scuffs, a two-step approach works better: start with a machine or hand-applied scratch remover to level the area, then follow with a finishing polish to restore shine and blend the repair into the surrounding paint. Foam applicator pads tend to give more even results than cloths alone, especially on curved panels like fenders and bumpers.
Many homeowners can restore a hazy or scratched panel to a glossy finish in under an hour using this method. Always work in the shade or in cooler temperatures, since compound can dry too quickly on hot paint and become difficult to remove. Once finished, a coat of wax or sealant helps protect the repaired area and blend its sheen with the rest of the vehicle.
Before applying any scratch remover or rubbing compound, do a quick fingernail test to gauge how deep the damage goes. Run your nail across the scratch — if it glides over smoothly without catching, the scratch is likely confined to the clear coat and is a good candidate for DIY correction. If your nail catches or snags in the groove, the scratch has probably penetrated into the primer or base coat, and polishing alone won’t fix it.
It’s important to test any product on a small, inconspicuous area first — like a spot near the door jamb or under the fuel filler door — since aggressive compounds can thin the clear coat if overused. Clear coats are typically only 1.5 to 2 mils thick, so repeated buffing in the same spot can wear through it faster than expected. Start with a less abrasive polish before moving to a heavier cutting compound, and always work in small sections with a microfiber applicator pad rather than a shop rag.
If the scratch catches your fingernail when you run it across the surface, it likely extends past the clear coat and will need professional attention rather than a DIY fix. At that point, options like touch-up paint, spot priming, or a full panel respray become more appropriate than at-home polishing. Attempting to compound out a deep scratch not only fails to fix it but can create a dull, hazy halo around the damaged area from excessive clear coat removal.
- Use a fingernail test to gauge scratch depth: if your nail catches or snags, it’s likely gone through the clear coat and may need filler or touch-up paint rather than just polish
- Start with the least aggressive product first, such as a scratch remover or light polishing compound, before moving to anything heavier
- Work in small sections (about 2×2 feet) with light pressure, using a foam applicator pad or microfiber cloth in straight lines rather than circles
- Check your progress often by wiping the area clean and inspecting under bright light, so you don’t over-correct or thin the clear coat
- Always follow compound work with a coat of wax or sealant to seal the finish and protect against UV exposure and moisture
- Avoid direct sunlight while applying products, since heat causes compounds to dry too fast and can leave hazing or streaks
- Work on a cool painted surface, ideally below 85°F, and consider moving to a garage or shaded area if needed
- Test any new product on a small, inconspicuous spot first to confirm it won’t dull or discolor the paint
Repairing Dents Without Damaging the Original Paint
Dents from hail, shopping carts, or minor parking mishaps don’t always require repainting, especially when the paint itself remains unbroken. This is where paintless dent repair has become a popular choice among vehicle owners looking for a faster, more affordable solution. Technicians use specialized tools to gently massage the metal back into its original shape from behind the panel, preserving the factory paint job in the process.
This method works best on shallow to medium dents located away from panel edges, and it’s especially effective for hail damage that leaves multiple small dents across a hood or roof. Because there’s no need for fillers, sanding, or repainting, the process is often quicker and less expensive than traditional bodywork, making it worth asking about before committing to a full repair estimate.
- Best suited for dents without paint cracking
- Commonly used for hail damage and door dings
- Preserves the original factory finish
- Typically faster and less costly than repainting
Choosing Between DIY Fixes and Professional Repair
It’s tempting to search for a home remedy for every mark on your vehicle, but knowing when to call in help saves time and money in the long run. Small scuffs and light scratches are reasonable DIY projects, but anything involving bent metal, exposed primer, or misaligned panels is best left to trained hands at auto body shops. Attempting to repair significant damage yourself can sometimes make the eventual professional fix more expensive if the problem is compounded.
Professionals have access to color-matching technology, specialized tools, and controlled environments that are simply not replicable in a driveway. If you’re unsure which category your damage falls into, it’s worth getting a free estimate before buying products or attempting repairs on your own.
- DIY works for light scuffs and shallow surface scratches
- Professional help is needed for bent panels or exposed metal
- Estimates are often free and help clarify your options
- Color matching is difficult to achieve without professional equipment

What Happens During a Typical Body Shop Visit
Walking into a repair facility for the first time can feel confusing if you don’t know what to expect. Most auto body repair visits begin with a visual inspection, where a technician or estimator examines the vehicle’s exterior, checks panel alignment, and notes any dents, scratches, or paint damage. This typically takes 15 to 30 minutes and often includes photos for documentation and insurance purposes.
From there, the shop prepares a written estimate that breaks down labor hours, replacement parts, and paint or materials costs. Estimates can vary between shops, so it’s worth understanding whether the quote uses original equipment manufacturer (OEM) parts or aftermarket alternatives, since this affects both price and final fit.
Many facilities also offer a supplemental inspection once panels are removed, since hidden damage isn’t always visible during the initial walk-around. Frame misalignment, damaged brackets, or crushed structural components often only surface after disassembly begins. When this happens, the shop will typically contact you or your insurance adjuster to revise the estimate before continuing.
Throughout the process, most auto body repair shops will also provide a timeline for completion, which can range from a few days for minor cosmetic work to several weeks for extensive structural repairs. Ask about warranty coverage on both parts and labor before work begins, as reputable shops usually stand behind their repairs for a year or more.
A typical visit starts with a written estimate, usually following a visual inspection and sometimes a teardown of damaged panels to check for hidden issues underneath, like frame damage or crushed structural components that aren’t visible from the outside. Turnaround time depends heavily on parts availability and the extent of the damage, so ask for a realistic timeline upfront rather than assuming a quick fix. Minor cosmetic repairs like a bumper scuff might take two to three days, while significant collision damage requiring frame straightening or multiple new panels can stretch into several weeks, especially if parts need to be special-ordered.
Once the estimate is approved, the shop will typically order parts, schedule disassembly, and begin structural repairs before moving on to bodywork, priming, and painting. Paint matching is its own process, often involving a spectrophotometer to read your vehicle’s exact factory color code, since sun fading and age can shift the actual shade slightly from what the original paperwork lists. Expect a final quality check and test drive before the car is handed back to you, which is also your chance to inspect panel gaps, paint texture, and overall finish before signing off.
Reputable technicians will also communicate clearly about what your insurance covers versus what you’ll be responsible for out of pocket, which helps you budget accordingly and avoid surprises when the final invoice arrives. This conversation should cover your deductible, whether the shop bills insurance directly, and how supplemental claims work if additional damage is discovered mid-repair. It’s worth asking whether they use OEM parts or aftermarket alternatives, since that choice can affect both cost and your car’s resale value down the line.
- Initial estimate covers only visible, easily assessed damage — dents, scratches, and cracked panels
- Supplemental estimates often follow once technicians disassemble the vehicle and find hidden damage underneath
- These “hidden damage” discoveries can add anywhere from a few hundred to several thousand dollars to the original quote
- Parts availability affects repair timelines significantly, especially for imports or discontinued models
- OEM parts may take longer to source than aftermarket alternatives, so ask about both options upfront
- Ask whether a warranty is offered on completed auto body repair work, and get the terms in writing
- A solid auto body repair center warranty typically covers paint and workmanship for as long as you own the vehicle
Navigating Insurance Claims After a Collision
Dealing with insurance paperwork is often more stressful than the damage itself, but understanding the basics makes the process smoother. After an auto collision, most insurers require photos, a police report if applicable, and an estimate from a licensed repair facility before approving a claim. Since car collision repair costs can vary widely depending on the shop and the extent of the damage, it’s worth knowing that you generally have the right to choose your own repair facility rather than being limited to your insurer’s preferred list.
Keep detailed records of every conversation, estimate, and receipt throughout the claims process, since discrepancies can arise between the insurance adjuster’s assessment and the shop’s findings. If your insurer’s offer seems low compared to the written estimate, you can request a second opinion or ask the shop to communicate directly with the adjuster on your behalf.
- You typically have the right to choose your repair shop
- Document damage with photos immediately after the incident
- Keep copies of all estimates and correspondence
- Request a second estimate if the payout seems too low
Matching Paint Color for a Seamless Repair
One of the trickiest parts of restoring a damaged panel is making sure the new paint blends invisibly with the surrounding factory finish. Modern vehicles often use complex, multi-layered colors including metallics and pearls, which shift subtly depending on lighting and angle. Skilled technicians use your vehicle’s paint code along with spectrophotometer readings to mix a custom match rather than relying on a generic formula.
Even with accurate mixing, blending techniques matter just as much as the color itself, since a hard edge between old and new paint can be just as noticeable as a mismatch. Many technicians will blend the new paint slightly into adjacent panels to ensure the transition is undetectable in daylight and under artificial lighting alike.
- Paint codes are usually found on a door jamb sticker
- Metallic and pearl finishes require extra blending care
- Spectrophotometers help achieve precise color matches
- Blending into adjacent panels reduces visible edges
Protecting Your Finish Once Repairs Are Complete
Once your vehicle looks brand new again, it makes sense to invest a little effort into keeping it that way. Applying a quality paint protection film or sealant over freshly repaired panels adds a buffer against rock chips, minor scrapes, and UV fading, which is especially useful on high-impact areas like the front bumper and hood. This step is often overlooked, but it can meaningfully extend the life of your recent repair.
For longer-lasting protection, many vehicle owners are now choosing car ceramic coating, which forms a durable, hydrophobic layer that resists dirt, water spots, and light chemical staining. While it won’t prevent dents or deep scratches, it does make everyday maintenance easier and helps the repaired area maintain its gloss for years rather than months.
- Paint protection film is ideal for high-impact areas
- Ceramic coatings resist water spots and light staining
- Regular washing extends the life of any protective layer
- Reapplication schedules vary by product and usage
Finding a Repair Facility You Can Trust
Not all repair facilities offer the same level of quality, so a bit of research before committing to a shop pays off. Look for certifications from recognized industry organizations, positive reviews that mention long-term satisfaction rather than just speed, and warranties on both parts and labor. Many auto body centers are also affiliated with specific insurance networks, which can simplify the claims process if you choose to use one of their preferred partners.
Ask about the technicians’ experience with your specific vehicle make, since luxury or specialty vehicles sometimes require unique tools or training. A trustworthy shop will walk you through the repair plan, explain your options clearly, and never pressure you into unnecessary upgrades or services.
- Look for industry certifications and technician training
- Read reviews focused on long-term results, not just speed
- Ask about warranties on parts and labor
- Confirm experience with your specific vehicle make or model
Restoring your vehicle’s exterior after damage doesn’t have to be overwhelming once you understand your options and know what questions to ask. Start by honestly assessing the damage, then decide whether a simple DIY fix will do or whether it’s time to get a professional estimate. Taking the extra step to protect your finish after repairs will help you avoid repeating the same process down the road. With a little knowledge in hand, you’re well equipped to get your vehicle looking its best again.
